Table of Contents
Introduction
Zabbix is a amazingly powerful open-source monitoring solution that allows system administrators to monitor various metrics related to the performance of their IT infrastructure, Network Appliances, Servers, and many more devices.
Nginx is one of the most popular open-source web servers that powers some of the largest and busiest websites on the internet. It is surprisingly lightweight and very fast server that can perform as a web server or a reverse proxy.
This tutorial will provide step-by-step instructions on how to install Zabbix on Ubuntu with Nginx, as well as how to manage and.
Prerequisites before Installing Zabbix Server
Before you begin you must have a live Ubuntu Server with a non-root user with sudo privileges, Optionally you can have a fully qualified domain name for installing an SSL certificate.
Step 1 – Updating the system
For everything to go smoothly the first step is updating the system with the latest packages and binaries, Open the terminal and run the following command:
sudo apt update && sudo apt upgrade -yThis command will update the local package index and install any available updates on the system.
Step 2 – Checking your webserver
Sometimes Ubuntu Server installation comes with the default apache web server, It will conflict with Nginx so you have to check if apache is already installed or not, Run the below command to check:
sudo service apache2 statusOutputs:
Unit apache2.service could not be found.If you get the above output it means apache2 is not installed you are good to go from here, you can ignore the steps below.
If you get the below output it means apache2 is installed but it’s inactive
● apache2.service
     Loaded: masked (Reason: Unit apache2.service is masked.)
     Active: inactive (dead)
and If you get the below output it means apache2 is installed and is active
● apache2.service - The Apache HTTP Server
     Loaded: loaded (/lib/systemd/system/apache2.service; enabled; vendor preset: enabled)
     Active: active (running) since Sun 2023-03-19 13:28:40 IST; 5h 21min ago
       Docs: https://httpd.apache.org/docs/2.4/
    Process: 774 ExecStart=/usr/sbin/apachectl start (code=exited, status=0/SUCCESS)
   Main PID: 1093 (apache2)
      Tasks: 12 (limit: 18946)
     Memory: 152.7M
        CPU: 1min 52.991s
     CGroup: /system.slice/apache2.service
             ├─1093 /usr/sbin/apache2 -k start
             ├─5782 /usr/sbin/apache2 -k start
Run the below commands to uninstall the apache2 web server from your Ubuntu
sudo service apache2 stop
sudo apt remove apache2
sudo apt autoremove -y
These commands will remove apache from your server, now we can proceed further with installing Nginx.
Step 3 – Installing Nginx and MariaDB
Zabbix uses Mysql as its database because of that we have to install MariaDB which is a tweaked version of MySQL and, Nginx is available in Ubuntu’s default repositories so it can be installed by using apt package manager which is the default in ubuntu.
Run the following command to Install Nginx and MariaDB:
sudo apt install nginx mariadb-client mariadb-server -yThis command will install Nginx as the web server, and MariaDB as the database server.
Step 4 – Install Zabbix On Ubuntu
Zabbix 6.4 uses PHP8.1 which is not available apt package manager, Now we have to go to Zabbix Website and download Zabbix installation files which will include PHP8.1,
Now run the commands below to install Zabbix On Ubuntu 22.04 and PHP 8.1
sudo wget https://repo.zabbix.com/zabbix/6.4/ubuntu/pool/main/z/zabbix-release/zabbix-release_6.4-1+ubuntu22.04_all.deb

sudo dpkg -i zabbix-release_6.4-1+ubuntu22.04_all.deb

sudo apt update

sudo apt install zabbix-server-mysql zabbix-frontend-php zabbix-nginx-conf zabbix-sql-scripts zabbix-agent -y
Step 5 – Setup MySQL and Create a Database for Zabbix
Now we will setup MySQL for Zabbix, Make sure you have MySQL server up and running, Confirm it by running the below command:
sudo service mysql statusThe output should be like this:
● mariadb.service - MariaDB 10.3.38 database server
     Loaded: loaded (/lib/systemd/system/mariadb.service; enabled; vendor preset: enabled)
     Active: active (running) since Sun 2023-03-19 13:48:09 UTC; 5min ago
       Docs: man:mysqld(8)
             https://mariadb.com/kb/en/library/systemd/
   Main PID: 17457 (mysqld)
     Status: "Taking your SQL requests now..."
      Tasks: 30 (limit: 4573)
     Memory: 64.7M
     CGroup: /system.slice/mariadb.service
             └─17457 /usr/sbin/mysqld

Mar 19 13:48:09 zabbix systemd[1]: Starting MariaDB 10.3.38 database server...
Mar 19 13:48:09 zabbix systemd[1]: Started MariaDB 10.3.38 database server.
Mar 19 13:48:09 zabbix /etc/mysql/debian-start[17492]: Upgrading MySQL tables if necessary.
If you see the above output it means MySQL is running fine,
Now run the below commands to create a database for Zabbix:
sudo mysql -uroot -p
#enter password if promptedmysql> create database zabbix character set utf8mb4 collate utf8mb4_bin;
mysql> create user zabbix@localhost identified by 'CHANGE-THIS-PASSWORD';
mysql> grant all privileges on zabbix.* to zabbix@localhost;
mysql> set global log_bin_trust_function_creators = 1;
mysql> quit;Now import the Zabbix database schema to MySQL by typing the below command:
zcat /usr/share/zabbix-sql-scripts/mysql/server.sql.gz | mysql --default-character-set=utf8mb4 -uzabbix -p zabbixThe above command will import the Zabbix Database schema to MySQL, as our schema is imported we have to disable log_bin_trust_function_creators option in MySQL, and run the below commands:
sudo mysql -uroot -p
#enter password if promptedmysql> set global log_bin_trust_function_creators = 0;
mysql> quit;Step 6 – Configure Zabbix
Now we will Configure the database for the Zabbix server,
open /etc/zabbix/zabbix_server.conf in your choice of editor and find
#DBPassword=passwordand uncomment the line by removing “#” and replacing “password” with your password like below:
DBPassword=CHANGE-THIS-PASSWORDnow edit file /etc/zabbix/nginx.conf with your choice of editor and uncomment and set ‘listen’ and put the port of your choice, Like below:
listen 1111;Now start the Zabbix server and agent processes and make it start at system boot.
systemctl restart zabbix-server zabbix-agent nginx php8.1-fpm
systemctl enable zabbix-server zabbix-agent nginx php8.1-fpm
Zabbix should now be running on http://your-server-ip:1111/ you will see a setup screen like this:

Select Your Language and click next:

Scroll down and check, if you have followed all the steps in this guide then everything must be ok.

Select Below:
Database type: MySQL
Database Host: localhost
Database Port: 0
Database Name: zabbix
Store credentials in plain text
User: zabbix
Password: CHANGE-THIS-PASSWORD
password should be what you created above while we were setting up MySQL
Click Next Step:

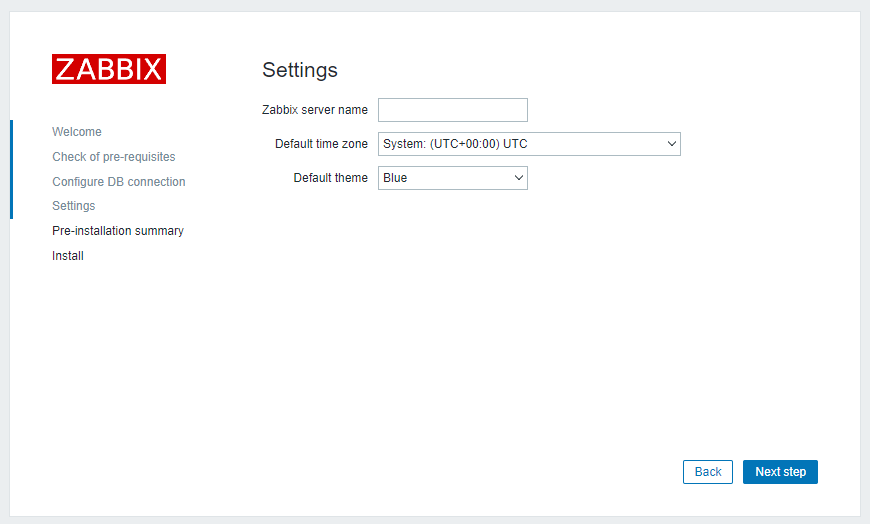
Enter the name you want to give this server, and select the timezone and theme (You can change it later) click Next step:

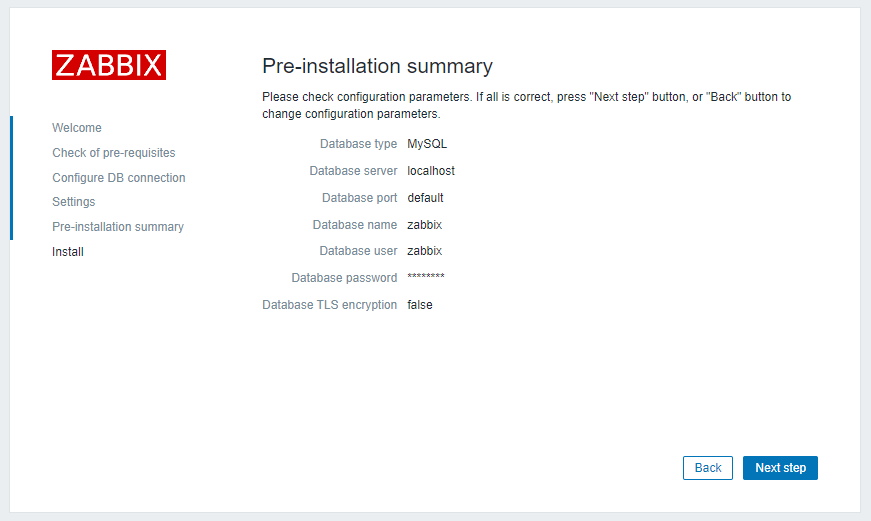
Check everything if it’s ok click on the Next step:

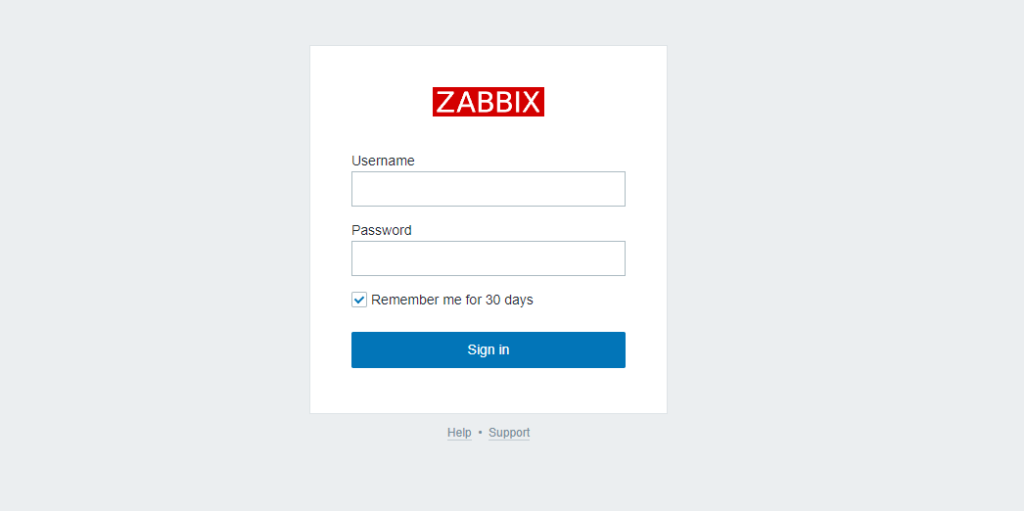
Click Finish and you will see a login screen like this:

Login with Zabbix default username Admin and default password zabbix
Optional Steps:
Add A domain to your Zabbix server by leveraging the Reverse Proxy function of Nginx:
Firstly you will have to add “A” record to your domain through your registrar, You can find how to add an A record in the GoDaddy registrar from here, after that, Check the below command, change “zabbix.example.com” with your domain and “http://192.168.1.5:1111” with http://your-server-ip:1111/ and run this command on your ubuntu:
echo 'server {
    listen 80;
    listen [::]:80;

    server_name zabbix.example.com www.zabbix.example.com; #change this with your domain

    location / {
        proxy_pass http://192.168.1.5:1111; #change this with your IP and Port
        include proxy_params;
    }
}' | sudo tee /etc/nginx/sites-available/zabbix
After this run the below commands:
sudo ln -s /etc/nginx/sites-available/zabbix /etc/nginx/sites-enabled/
sudo service nginx reload
Zabbix should be running on zabbix.example.com now.
Add SSL to your Zabbix server domain:
Now we will add SSL Certificate for additional security on the domain, we will be installing certbot to get a Let’s Encrypt free SSL certificate, Run the below command to install certbot and Certificate Installation:
apt install certbot python3-certbot-nginx -y
sudo certbot --nginx -d zabbix.example.com -d www.zabbix.example.com
After that you can access your zabbix through https://your-domain.com, Let’s encrypt only provide certificates for 3 months, so we have to add a cron job to automatically renew the certificate before 3 months, type below code:
sudo crontab -eselect your editor if prompted and paste the below line:
@monthly certbot renew --force-renewalSave and Close,
You have now successfully installed Zabbix On Ubuntu Server.
Conclusion
In conclusion, installing Zabbix Server 6.4 on Ubuntu 22.04 with Nginx Server is a straightforward process that can be completed in a few simple steps. With the help of this tutorial, users can set up a powerful monitoring system that can help them keep track of their network infrastructure and server performance. Zabbix Server provides an easy-to-use interface that allows users to configure monitoring settings, create custom dashboards, and generate reports. Additionally, the integration with Nginx Server ensures that the Zabbix interface is secure and fast. By following the steps outlined in this tutorial, users can install Zabbix Server 6.4 with Nginx Server on Ubuntu 22.04 and start monitoring their network infrastructure and server performance.

